If your bird is holding a leg up, dangling it at an odd angle, or refusing to put weight on it, there is a good chance something is seriously wrong. A broken leg is one of the more common injuries birds suffer, and while it is genuinely frightening to deal with, there are real steps you can take right now to keep the bird stable and as comfortable as possible while you get it to proper care. This guide walks through everything: recognizing the injury, first aid, when splinting actually makes sense, how to do it correctly at home as a temporary measure, and how to find help fast.
Broken Leg Bird Splint: First Aid Steps and When to Stop
Marcus Chen
9 Apr 2026
Recognize a likely broken leg (and other urgent injuries)
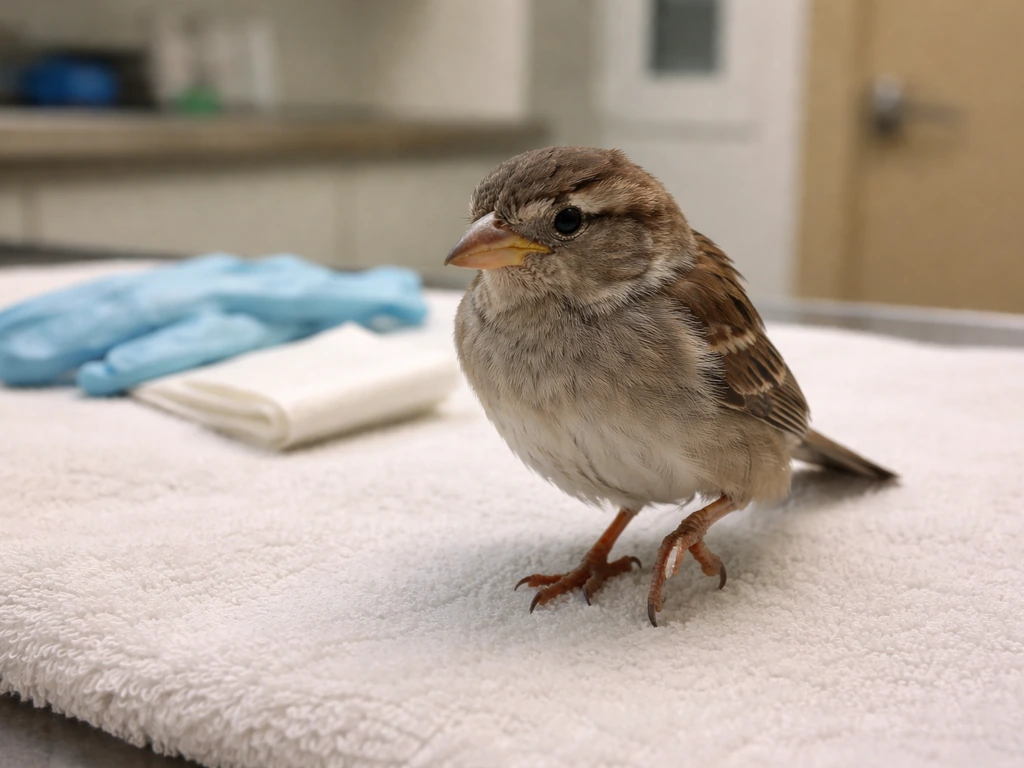
A fractured leg in a bird does not always look like a cartoon broken bone. Sometimes the signs are subtle. The most common things you will notice are: the bird limping or shifting weight off one leg, holding the foot up off the perch or ground, a leg hanging at an unnatural angle, visible swelling or bruising, or the bird simply spending more time on the cage or aviary floor than usual. In worse cases, the leg will dangle loosely with no muscle control at all.
Here is where it gets tricky: a lot of conditions can look exactly like a fracture. Tendon and ligament injuries, dislocations, infections, gout, arthritis, and pododermatitis (bumblefoot) can all cause a bird to avoid bearing weight or hold a leg up. That is why any bird with a dangling limb or complete inability to use a leg needs veterinary assessment, not just a wait-and-see approach. You genuinely cannot tell the difference between these conditions without an exam and usually an X-ray.
While you are looking at the leg, also scan for other injuries. Birds that have been attacked by a cat or dog, struck a window, or been hit by something may have internal injuries, bleeding, broken wings, or head trauma on top of the leg problem. Run through a quick head-to-tail check: is the bird breathing normally, or is it breathing with its mouth open, tail bobbing, or puffed up and lethargic? Is there any visible bleeding? These details matter enormously for how you proceed in the next few minutes.
Immediate first aid: stabilize, warm, and limit movement
Before you even think about splinting, your first job is to stabilize the bird. That means warmth, quiet, and reduced handling. LafeberVet’s emergency/critical care guidance notes that debilitated birds should be kept warm and placed in a dark, quiet environment or incubator as appropriate warmth, quiet. Stress and hypothermia can kill an injured bird faster than the fracture itself, so this step is not optional.
Place the bird in a ventilated box or carrier lined with a soft towel. A shoebox with air holes punched in the lid works fine. Keep the box in a semi-dark, quiet spot away from pets, children, and noise. For warmth, set a heating pad on its lowest setting and slide the box so only half of the bottom is on the pad. This is critical: the half-on, half-off setup lets the bird move away from the heat if it gets too warm. You are aiming for roughly 85 to 95°F inside the container. If you do not have a heating pad, a small bottle of warm water wrapped in a cloth placed at one end of the box works as a substitute.
Once the bird is contained and warming up, resist the urge to keep checking on it. Every time you open the box, you are adding stress, and stress genuinely worsens outcomes in injured birds. Set it up correctly once, then leave it alone while you make calls and gather supplies. Do not offer food or water yet unless you have been specifically instructed to do so by a rehabber or vet.
When NOT to splint: red flags that mean get help right now
Splinting is not always the right move, and doing it wrong can cause real harm. Before you reach for any bandaging supplies, check for the following red flags. If any of these are present, skip the splinting and focus entirely on getting the bird to a professional as fast as possible.
- Open-mouth breathing, tail bobbing with each breath, or gasping. These are signs of respiratory distress and are life-threatening.
- Bleeding that you cannot stop within a few minutes of gentle pressure. This includes injuries from a blood feather, beak, or broken skin.
- A wound where you can see bone exposed through the skin. This is a compound fracture and requires immediate surgical care.
- Severe lethargy, inability to hold the head up, or a bird that feels cold and limp. These are signs of shock.
- Trauma from a cat or dog attack, even if the injury looks minor. Cat puncture wounds cause deep infection very quickly.
- Uncertainty about what is actually wrong. If you are not sure it is a fracture, do not splint. The risk of splinting a dislocation, tendon tear, or infected joint incorrectly is too high.
The general principle from experienced wildlife rehabilitators is straightforward: do not attempt to treat the bird's injuries yourself unless a veterinarian or licensed rehabilitator has specifically told you to. Splinting at home is a temporary stabilization tool, not a treatment. It makes sense in very specific situations where a clean, closed fracture needs to be kept still during transport and a vet appointment is a few hours away. It is not appropriate as a substitute for professional care.
What you need: safe temporary supplies
If you have confirmed there are no red-flag emergencies and you are planning to splint as a temporary stabilization measure before a vet visit, gather these supplies first. Do not improvise with materials that can stick to feathers or skin, restrict circulation, or shift out of place.
- Non-stick (Telfa) pads or soft gauze padding. This goes between the splint and the bird's skin. Never skip this.
- Rolled gauze (like Kling) to hold the padding and splint in place.
- Cohesive bandage (Vetrap or similar self-adhesive bandage). This is your outer layer and should be applied with almost no tension.
- A lightweight splint material: a popsicle stick, folded cardboard, or thin foam cut to size. For very small birds like budgies or finches, a stiff feather quill or small folded piece of foam is more appropriate than a rigid stick.
- Small blunt scissors for cutting bandage material.
- A second pair of hands if at all possible. Wrapping a frightened bird's leg alone is genuinely difficult.
Note on setup: have everything cut, measured, and laid out before you pick up the bird. Minimize the time the bird is out of its box and in your hands. The faster you work, the less stress the bird experiences.
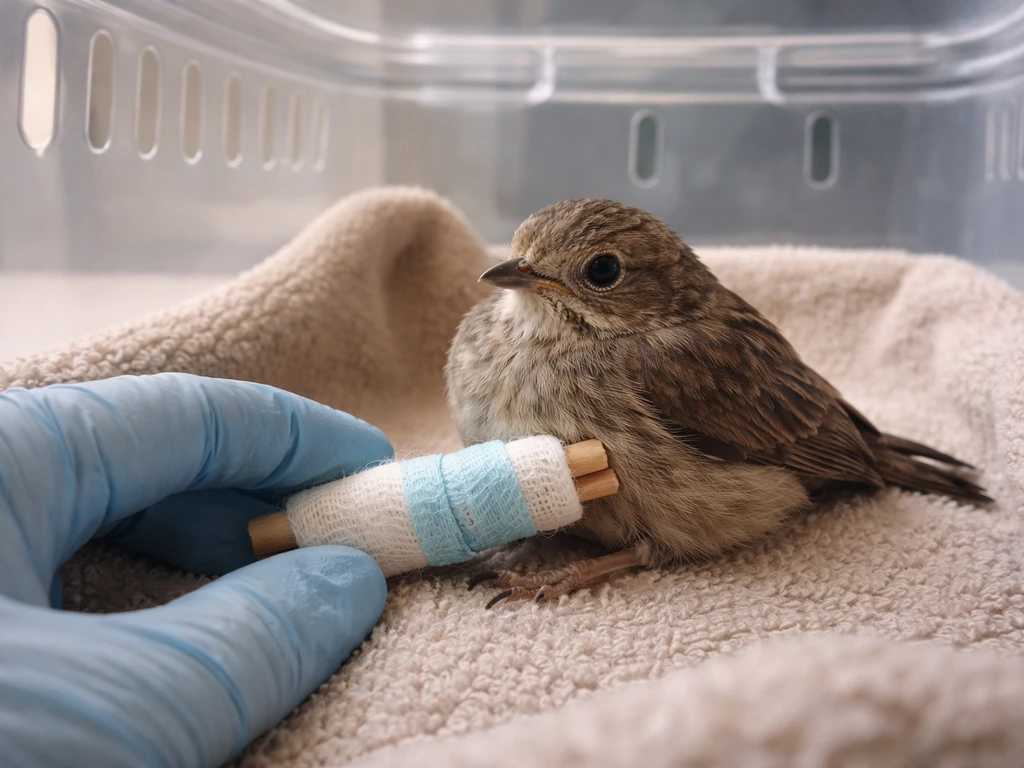
How to splint a bird's broken leg: step-by-step
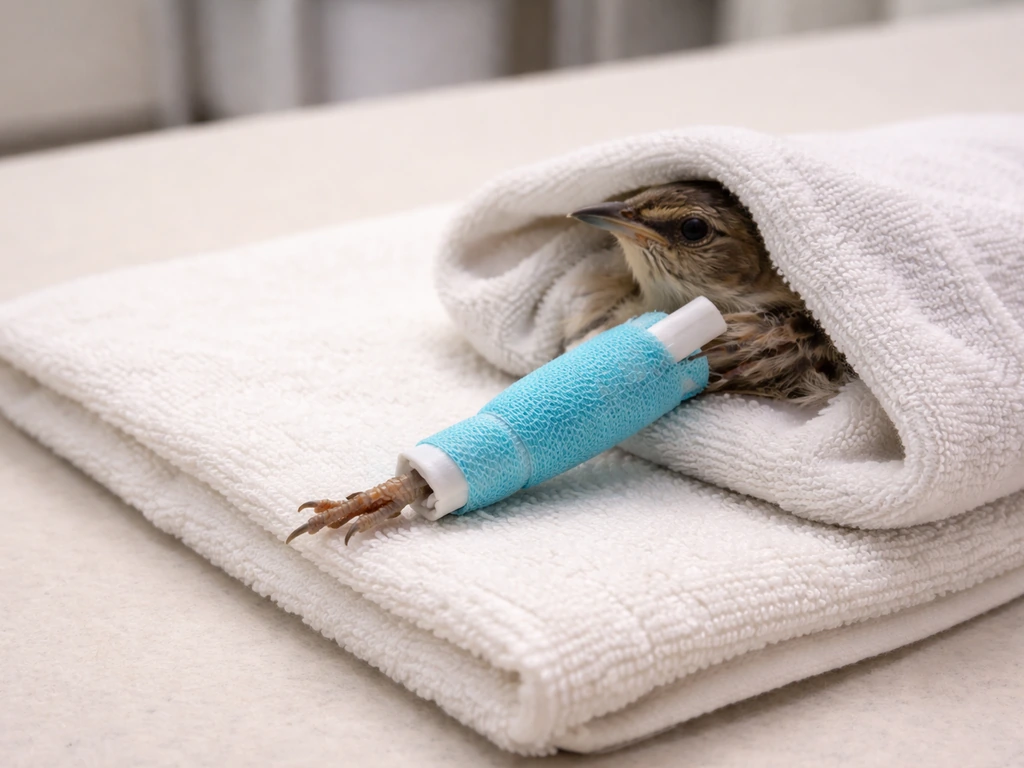
This technique applies a basic lateral splint to stabilize a closed leg fracture temporarily. It is intended to reduce movement and pain during transport, not to set the bone. For a deeper look at broken leg bird treatment options beyond first aid, an avian vet will assess whether casting, surgery, or a more advanced splinting approach is needed.
- Wrap the bird gently in a small towel, leaving the injured leg accessible. Have a helper hold the bird if possible, keeping it calm and still.
- Gently extend the injured leg to a natural resting position. Do not force it or try to "reset" the bone. Work with the position the leg naturally wants to be in.
- Apply a layer of soft padding (Telfa pad or folded gauze) around the leg first. This is non-negotiable: always place padding between any splint material and the bird's skin to prevent abrasions and pressure sores.
- Position your splint material (popsicle stick, folded cardboard, or foam) along the outside of the padded leg. The splint should span the joint above and below the fracture site to actually immobilize the break.
- Use rolled gauze to gently secure the splint to the padded leg. Wrap in a spiral from below the fracture upward. Keep tension light. You should be able to slide a fingertip under the wrap.
- Finish with a single layer of cohesive bandage (Vetrap) over the gauze for protection. Again, minimal tension. Wrap it on and let the self-adhesion do the work.
- Leave the toes uncovered if at all possible. Exposed toes let you check blood flow and neurovascular status every 30 minutes or so.
- Place the bird back in the warm, dark box immediately. Do not leave it on a flat surface where it might try to walk or flap.
Two common mistakes that cause real harm: wrapping too tightly and skipping the padding layer. Too-tight bandaging cuts off circulation to the foot within minutes and can cause permanent damage. If the toes below your splint look swollen, feel cold, or change color (pale, purple, or blue), the wrap is too tight. Remove it carefully and start over with less tension. The second mistake is applying any part of the splint directly against bare skin or feathers without padding underneath. Always use padding on splints and over any wounds, even if the skin looks intact.
One more thing to be aware of: too much padding can cause the splint to slip out of position, which defeats the whole purpose. Use enough padding to protect the skin, but keep it snug enough that nothing is sliding around.
Aftercare and monitoring until you reach a vet
Once the splint is on, your job shifts to monitoring and transport prep. Check the toes every 30 minutes for signs of circulation problems: they should be warm to the touch, a normal color for the species, and the bird should pull away or react if you gently touch them. If you press a toe pad and release, color should return quickly (within 1 to 2 seconds). Any swelling, discoloration, coldness, or lack of response means you need to loosen or remove the wrap immediately.
Keep the bird warm, quiet, and in its box between checks. Do not check more often than necessary. Each interaction is a stressor, and a stressed bird in pain can go downhill fast. If the bird seems calm and its toes look healthy, that is the best outcome you can manage at home.
For transport, warm your vehicle before bringing the bird out in cold weather. Use a small, secure, covered carrier or the same ventilated box, and avoid placing it anywhere it might slide around during the drive. Keep the car quiet and at a comfortable temperature. Cover the carrier with a light cloth to keep the environment dark and calm. A bird with a broken leg is already under enormous physical stress, and a loud, bright, bouncy car ride adds to that load significantly.
It is also worth being realistic about what a home splint accomplishes. It limits movement and reduces pain during transit. It does not set the bone, prevent infection, or address internal injuries. Do not let a successful splinting job give you a false sense that the situation is handled. The bird still needs professional evaluation as soon as possible.
A quick comparison: splinting vs. not splinting
| Situation | Splint at home? | Why |
|---|---|---|
| Closed fracture, no bleeding, bird is stable and alert | Yes, as temporary stabilization | Limits movement and pain during transport to vet |
| Open/compound fracture (bone visible through skin) | No | Requires immediate surgical care; splinting risks infection and further damage |
| Fracture with respiratory distress or shock | No | Life-threatening conditions take priority over the leg |
| Uncertain if it is a fracture vs. dislocation or tendon injury | No | Splinting the wrong injury incorrectly can cause more harm |
| Cat or dog attack wound present | No | Puncture wounds cause rapid systemic infection; vet urgently needed |
| Wild bird, no vet access for several hours | Yes, if trained to do so | Stabilize only; contact wildlife rehabber for phone guidance first |
Finding an avian vet or wildlife rescue today
Do not wait to start making calls. Even if you are mid-splint, have someone else searching for help at the same time. For a pet bird like a budgie, parrot, or cockatiel, you need an avian veterinarian specifically, not just a general dog-and-cat practice. Many general vets do not have the training or equipment to treat bird fractures properly. Search for "avian vet near me" or "exotic animal vet" and call ahead to confirm they see birds before you drive over.
For wild birds, contact a licensed wildlife rehabilitator. In the US, you can use Animal Help Now (animalhelpnow.org) to find your nearest licensed rehabber by location. Many wildlife centers also have phone lines staffed during the day for triage guidance. If you are in a rural area with limited options, call your nearest humane society or animal control office and ask them to refer you to a licensed rehabber.
When you call, be specific and calm. Tell them: what species the bird is (or your best guess), how you found it or what happened to it (window strike, cat attack, unknown), what the injury looks like, whether there is any bleeding or breathing difficulty, and what you have already done. The more detail you provide, the better they can triage the situation and prepare for your arrival. Sharing details about the cause and mechanism of injury, any visible disfigurement or bleeding, and the bird's current behavior helps the rehabber or vet prioritize care before you even walk through the door.
If you have a budgie or small pet bird and are not sure whether what you are seeing is actually a fracture, it helps to know what to look for specifically. Budgie bird broken leg symptoms can sometimes be more subtle than in larger birds, since small birds are very good at masking pain and discomfort. Any change in movement, balance, or perching behavior in a budgie is worth taking seriously.
One question people often ask while waiting to reach a vet is whether the leg might heal without any intervention. The honest answer: it depends heavily on the type and severity of the fracture, the bird's age, and how quickly proper care begins. Understanding whether a bird's broken leg can heal on its own is something worth reading through, but it should not delay getting professional assessment. Time genuinely matters with fractures in birds.
Finally, if you want to go deeper on understanding the full picture of what a leg fracture looks like and how it progresses, the broader article on broken leg bird injuries covers the anatomy and common causes in more detail. But right now, the priority is warmth, calm, a clean temporary splint if appropriate, and a call to a professional. AWARE Wildlife Center’s quick help guidance emphasizes calling for advice and next steps so you know whether and how to help, and cautions about restraint only if a wildlife professional instructs it blank" rel="noopener noreferrer">a call to a professional. You have already done the right thing by looking this up. Now act on it.
FAQ
If my bird is resting more after I splint, should I take the splint off to check the leg?
No, you should not remove the splint just because the bird looks calmer. Calmer behavior can happen from shock or pain suppression, and movement can restart bleeding or worsen swelling. Only professionals should decide when stabilization is no longer needed, especially if the cause could be dislocation, infection, or gout.
What should I do if I notice toe discoloration or cold toes after splinting?
If the toes become cold, pale, blue, or visibly swollen, you should act immediately (not “wait and see”). Carefully loosen any wrap to restore circulation, and recheck toe color and response within minutes. If you cannot get the circulation signs back to normal quickly, stop further at-home adjustments and prioritize urgent avian or wildlife care.
Can I splint if there is an open wound or visible skin damage on the leg?
Avoid wrapping over open wounds with anything that could harbor bacteria or stick, like fluffy cotton or unsterile gauze. If there is any open skin, you need a protective nonstick barrier on the wound first, then a light padding layer before the splint. If you see pus, increasing redness, or a strong odor, do not splint as a first option, get a vet or rehabber urgently.
Should I offer food or water to my bird while waiting for a vet after I splint?
Do not give food or water just because the bird is awake. Many injured birds are stressed and may vomit or aspirate, especially during transport or if anesthesia becomes necessary. If your vet or rehabber has not instructed you to offer anything, keep the bird in quiet warmth until you receive guidance.
What if my bird’s breathing looks abnormal at the same time as the suspected broken leg?
If the bird is breathing with its mouth open, gasping, persistent tail-bobbing, or you see major lethargy plus labored breathing, treat this as an emergency even if the leg is the most obvious problem. Keep the bird warm and quiet, reduce handling, and contact an emergency avian vet or wildlife hotline right away.
Should I try to straighten the leg before applying a bird splint?
Yes, you can worsen a case if you try to straighten a deformed limb or apply traction. The safest approach is to keep the current position as gently as possible, add padding, then stabilize without forcing the leg into alignment. If the leg looks wildly misdirected, get professional help immediately and do not attempt “setting.”
When is splinting unsafe or inappropriate, even as a temporary measure?
A splint is only meant for brief stabilization during transport when the fracture appears closed. If there is heavy bleeding, exposed bone, severe swelling, or signs of systemic illness, the priority becomes immediate professional care, not splinting. In those cases, focus on warmth, minimal handling, and rapid transport.
How often do I need to check toe circulation after a lateral splint is in place?
Check circulation less if the bird is very reactive, but do not skip entirely during the first hour. A practical approach is toe checks about every 30 minutes initially, then less often if everything stays normal and the bird is calm. Any change in toe warmth, color, or reaction should trigger an immediate wrap adjustment.
What if the splint feels loose or the bird keeps moving the leg out of place?
For a suspected fracture, the lateral splint goal is immobilization with padding, not rigid compression. If the bird resists or the leg shifts when you move, you likely need better snugness and better positioning of the padding, not tighter straps. Rewrap carefully only within your skill level; if you cannot maintain stability without risking circulation, stop and get help urgently.
What’s the safest way to keep my bird warm during the wait if I do not have a heating pad?
Instead of relying on a heating pad directly under the bird, use the half-on, half-off method or a warm-water bottle wrapped in cloth placed at the end of the container. Never warm the bird so aggressively that it could overheat, and avoid placing any heat source where it can tip over or make the bird slide against it.